Bathroom Remodel
In 2023, I decided to remodel a guest bathroom that was showing its age. It took 8 months and was a great experience in learning home improvement skills. I did everything myself, including the demolition, tiling, painting, and installing the fixtures. The tiling was, by far, the most challenging which I’ll get into later.
Here is the completed result. I forgot to take before pictures, so this was actually taken from the listing photos from when we purchased the house.
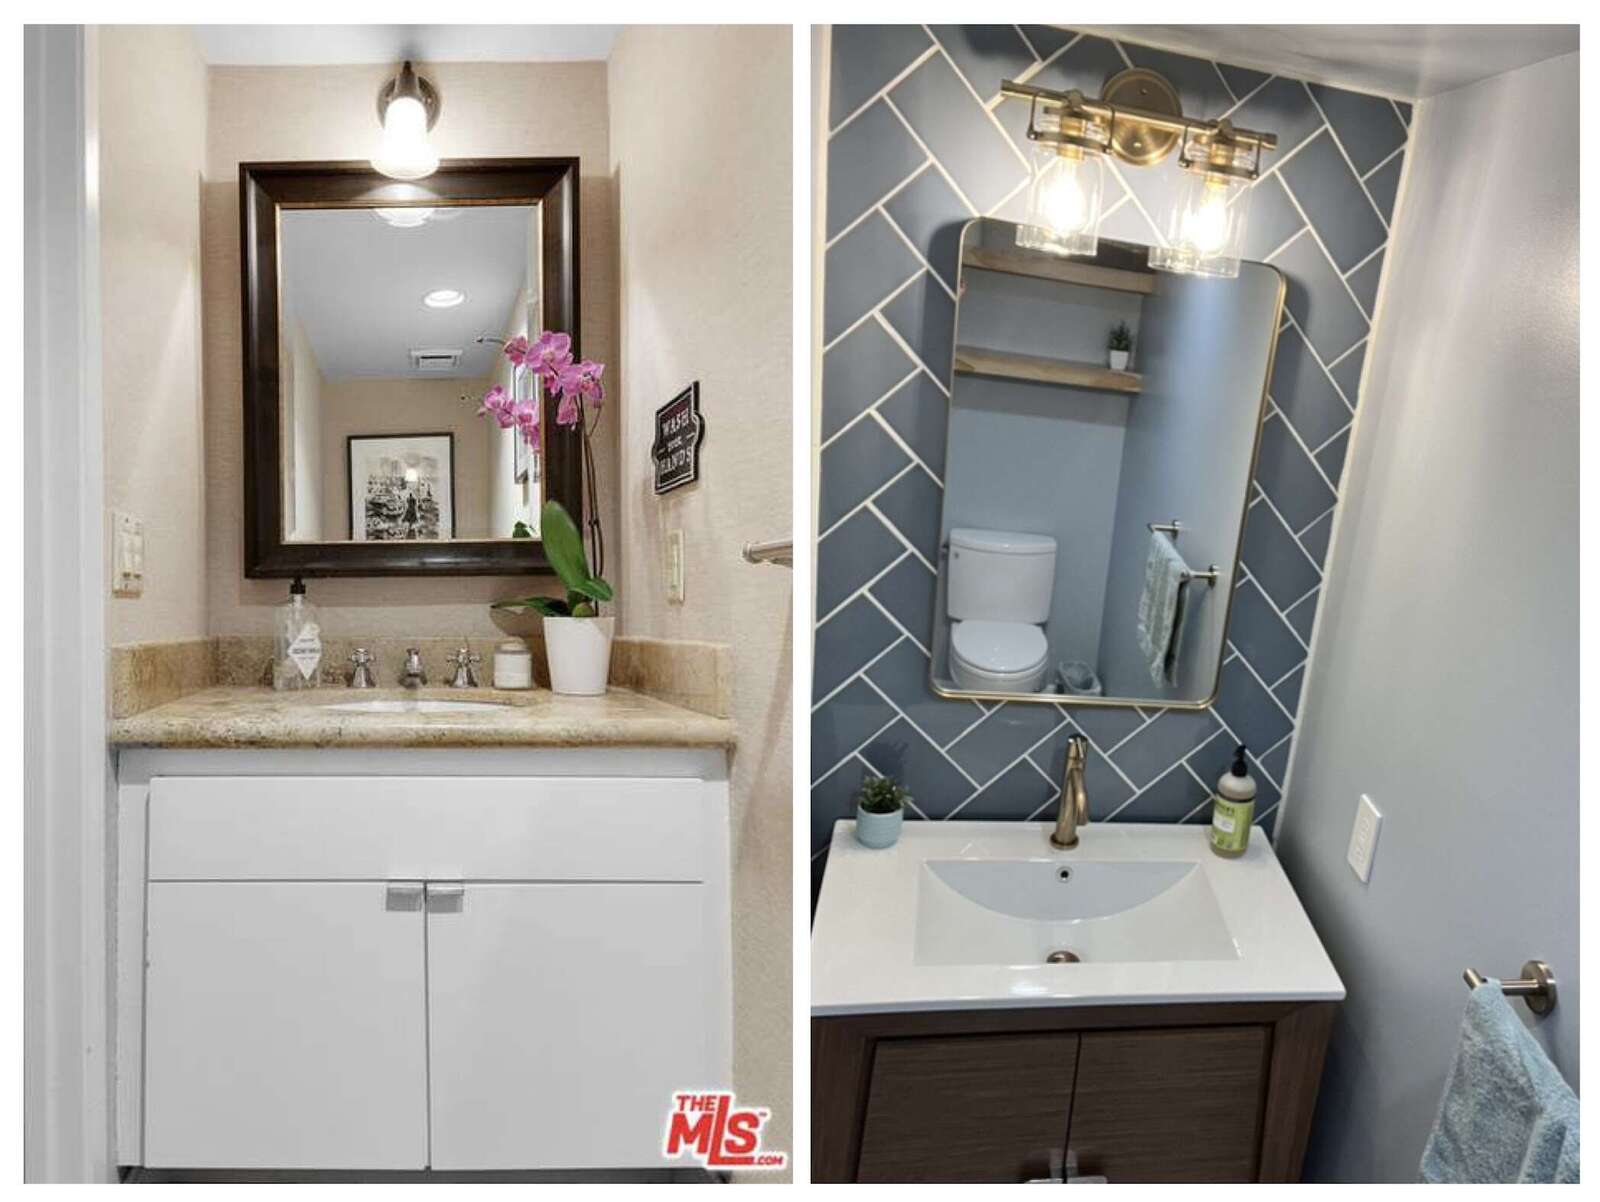
Before and after
The Process
Demolition
I approached the project in an iterative way. With my inexperience planning the entire project felt like too large of an endeavor so instead I just always focused on the next thing to do. And the first thing is always demolition.


I didn’t plan on replacing the floor until discovering that no flooring was installed under the vanity. This meant having to remove all the existing flooring which was quite a challenge! The flooring was glued to the concrete foundation with a heavy-duty adhesive. This required many hours with a circular saw to cut the flooring into smaller pieces, a 6 ft crowbar to pry them up, and sometimes a hammer drill for the really pesky parts. And finally a grinder to remove all of the glue.


Tile Floor
Next it was time to install tile but before that I had to ensure the concrete subfloor was flat enough. Large 24 x 12 inch tiles require the subfloor to vary <1/8 inch over 10 feet. My concrete subfloor varied about a 1/2 inch so I had to apply concrete leveler.


Now I could finally install the tile. To avoid cracking, I used a decoupling membrane between the subfloor and tile (it’s the orange layer in photos). Installing the tile went mostly smoothly but I used too much thinset and it squished into the gaps where the grout needed to go. This meant spending time with an oscillating multi-tool to clean it out and unfortunately chipping the edges of some of the tiles.


Exhaust Fan
I wanted to replace the exhaust fan also just because I wanted everything to be new. In retrospect the new fan wasn’t significantly quieter than the 50-year old one but it does look nicer. The main challenge was working in such a confined space. I ended up enlarging the drywall cut multiple times when I should have just made a single large cut to begin with.
While up there I found a sandwich wrapper. Initially I had hoped this was from the original construction but apparently it was from just a couple years ago when the previous owner renovated the bathroom above.


Finishing Touches
After tiling the floor I was feeling more confident in my abilities and wanted to try a herringbone pattern for the backsplash. I think it turned out well but I left too much gap on the sides which required a lot of caulking.

To maximize the small space I opted for built-in shelves. They look chunky but they’re actually hollow inside and it’s just plywood around a 2x2 lumber skeleton.

Installing the fixtures went smoothly. The toilet and vanity are shown below.

My first time using a chop saw for the base boards resulted in me cutting the power cord. Oops!

And voila the bathroom is complete. Here is the final product.


Cost Breakdown
Overall the cost including materials, tools, and fixtures (toilet, vanity, etc) was similar to what I would paid a handyman to do the same job in my area. But to me the benefit of learning how to do the work and being confident in my ability to fix things was worth it. Not to mention I have a respectable collection of tools for future projects.

What I Learned
I learned a LOT since I was coming from virtually zero home improvement experience. I highly recommend a bathroom remodel due to the breadth of skills needed:
- Drywall
- Painting
- Tiling
- Electrical
- Plumbing
- HVAC (for exhaust fan)
- Carpentry (builtin shelves)
Doing this work in my extremely limited free time due to having 2 kids under 2 forced me to plan things efficiently. For each stage of work I would plan things out, order materials, and then plan when I could have N-hours of time to do it. Everything was ordered online (Home Depot is very online friendly) except for the lumber. All in all a very satisfying project and I’d love to try a larger home improvement project in the future.